
Eurofighter Typhoon single seater
Revell | No. 04568 | 1:48

Hechos
- Marca:
- Revell
- Título:
- Eurofighter Typhoon single seater
- Número:
- 04568
- Escala:
- 1:48
- Tipo:
- Kit completo
- Publicado:
- 2006 Nuevos moldes
- Código de barras:
- 4009803045689 (EAN)
- Embalaje:
- Caja plegable (apertura lateral)
- Tema:
- Eurofighter Typhoon » Reactores (Aeronave)
Marcas
Eurofighter Typhoon
 Österreichische Luftstreitkräfte (Austrian Air Force 1955-now)
- 7L WA
2006
 Bundeswehr Luftwaffe (German Air Force 1956-now)
- JG 73 Steinhoff 30+09
2005 - Laage-Rostock
 Aeronautica Militare (Italian Air Force 1946-now)
- 9 Gruppo, 4 Stormo 4-6 / M.M. 7235 (CPT M. Maurizio)
2005 - Grosseto
Eurofighter Typhoon C.16
 Ejército del Aire (Spanish Air Force 1939-now)
- 113 Esc., Grupo 11 11-03 / C.16-23
2006 - Moron
Eurofighter Typhoon F Mk.2
 Royal Air Force (1918-now)
- No. 17 (R) Sqn. ZJ917 / AE (FLt.Lt. M.I. Thornton; SAG J.L. Dawkins; CPL S.I. Cumming)
2005 - Coningsby - No. 29 (R) Sqn. ZJ915 / BY (SQN Ldr. I.J. Hargraves; CPL D.P. Leonard; SAG P.J. Bellingham)
2006 - Coningsby - No. 3 Sqn. ZJ918 / QO-L (SQN Ldr. J.J. Attridge)
2005 - Coningsby
Contenido de la caja
Dimensiones:
432x248x108 mm
(17x9.8x4.3 inch)
Boxart diseñado por Egbert Friedl
Línea temporal del producto
Revell
Instrucciones
Descargar 27121Kb (.pdf)
Mercado
No partner shops available
Revisiones de caja
Reseñas externas
No conocemos ninguna revisión de caja para esto Eurofighter Typhoon single seater (#04568) desde Revell.
Revistas
")
")
Comentarios
If you have this version of the kit, the first thing you need to do is download the decal instructions for the one that says "2 Points" on the box. The decal numbers in this on are all wrong! Since the download instructions for the 2 Points one are really bad looking, it's worth 10 minutes of your time to transfer the correct numbers onto this set. Speaking of the decals, slice the formation lights on the rudder (decal 162, incorrect) in two vertically before you apply it so they can be applied on either side of the fin. Otherwise, the thickness of the fin doesn't allow the decal to wrap around to the correct position on either side (ask me how I found out!).
I found putting the kit together rather easy. I read some online reviews that said the intakes were a bit difficult, but I thought they were fine. Part 27, required a fair amount of putty to conform to part 26 so I suggest taking care of that before adding parts 29 and 30. While working on the intakes, you should paint part 26A (metallic? black?) just to give the illusion of depth. Otherwise you'll have two (grey in my case) blank engine faces. Not noticeable unless someone picks it up or you set it on a high shelf. However, Revell could have done a better job with this. If you've built any of Hasegawa's 1/48 F-4's, you'll know exactly what I'm talking about.
I don't think I installed the main landing gear wrong, but parts 67 and 70 didn't fit next to the wheel wells correctly without some interference from the main landing gear struts.
There is a nasty seam that runs the length of the canopy so be prepared for some careful buffing to remove it.
Revell provides a good amount of weapons. However, if you go with the pylons in step 39, depending of what weapons loadout you choose, you'll probably be short two weapons. I scrounged a couple of missiles from Hasegawa's anime version.
The painting instructions leave a lot to be desired as they are all (understandably) Revell's brand. I looked at a lot of online sources and matched what seemed reasonable.
Overall, a solid kit and well worth building. It goes together well, so even a beginner can make a decent looking Eurofighter from this kit - just make sure to get the corrected decal numbers first!
1 29 December 2024, 20:10
Proyectos
15 imágenes
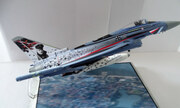
EUROFIGHTER TYPHOON - FINAL SHOOTING
1:48


Proyecto: REVELL EUROFIGHTER TYPHOON Single Seater


Galería

Todos los artículos » (33 en total)
Material de referencia
")
")
Todos los libros » (17 en total) Todos los walkarounds » (22 en total)